In this article, we’ll introduce you to the method of 360° VR live streaming using the QooCam 8K Enterprise. For beginners, we’ll be using YouTube. Utilising YouTube allows you to broadcast in 360° VR without the need for sophisticated streaming servers or specialised viewing apps.
The QooCam 8K Enterprise, despite its compact size, comes equipped with a wired LAN connector. A wired LAN connection is essential for live streaming. Attempting to stream live solely using Wi-Fi or mobile data is not just bold—it’s reckless.
Using a wired LAN and YouTube, even without intricate knowledge of networks or streaming servers (though a stable wired LAN connection is, of course, essential), you can achieve high-quality 4K 360° VR live streaming. It’s ideal for experiencing stable VR live streaming.
A noteworthy feature of the QooCam 8K Enterprise is that it includes an encoder within the camera itself. There’s no need to connect to a PC using software like OBS. A 4K RTMP encoder or a PC capable of processing 4K can cost at least several hundred pounds, but none of that is necessary with this camera. You can directly send RTMP to a specified URL using just the camera—a truly remarkable feature.
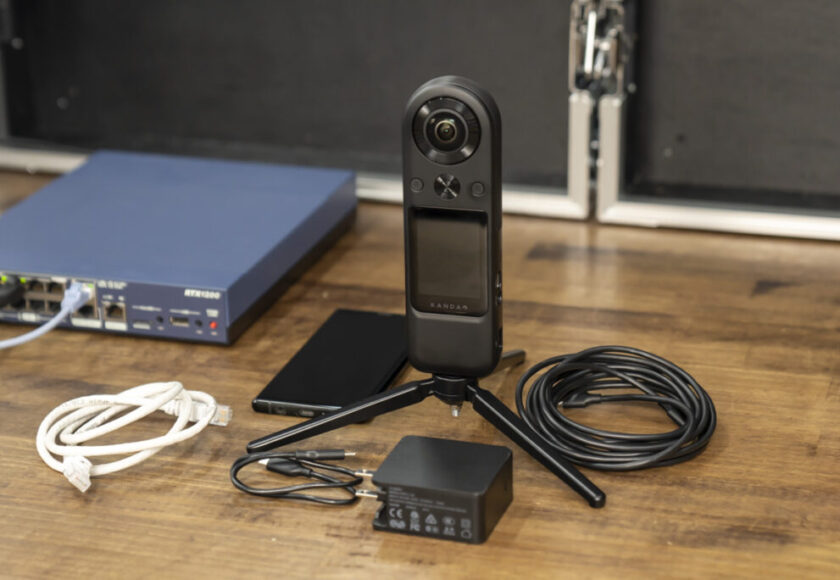
This article presents the minimum setup required for broadcasting. Please prepare the necessary items as needed for actual VR live streaming:
QooCam 8K Enterprise
Smartphone (USB Type C for convenience)
LAN cable
Router
Stable internet connection (wired LAN recommended)
That’s all.

QooCam 8K Enterprise Initial Setup and Preparation for 360° VR Broadcasting
360° VR live streaming involves long periods of operation. First, ensure you have a power source. Connect the AC adapter and USB cable that come with the QooCam 8K Enterprise to the camera. If the power cable isn’t long enough, prepare an extension cord. The QooCam 8K Enterprise can handle several hours of broadcasting without any issues. It is suitable for extended use.
While operating on AC power, the battery will continue to deplete. This is due to a feature that protects the battery, causing it to naturally discharge over time. Rest assured that the battery’s depletion will not affect the camera’s performance when it’s running on AC power.

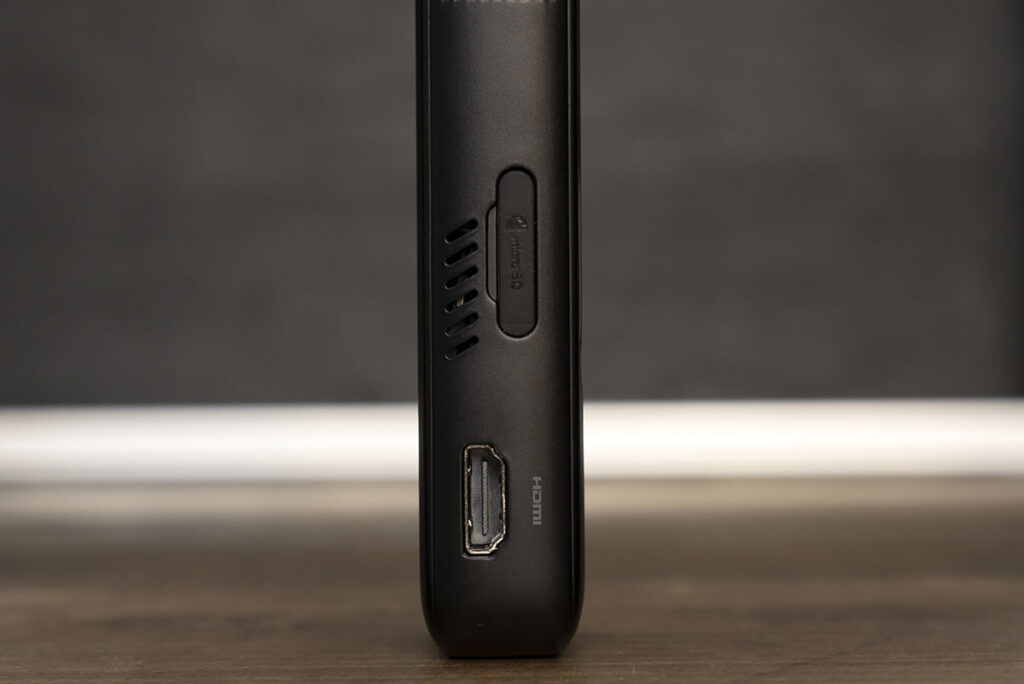
The QooCam 8K Enterprise features several ports: LAN, mic input, USB Type-C, and full-size HDMI. The camera has a 1/4 inch screw hole for mounting. The USB Type-C is used for app operations and charging, while the HDMI port outputs stitched video in real-time (exclusively). This article will not cover the use of HDMI.

The QooCam 8K Enterprise is capable of live streaming from 8K at 30fps to 4K at 30fps. Since YouTube supports up to 4K, this article will focus on broadcasting at 4K30fps.
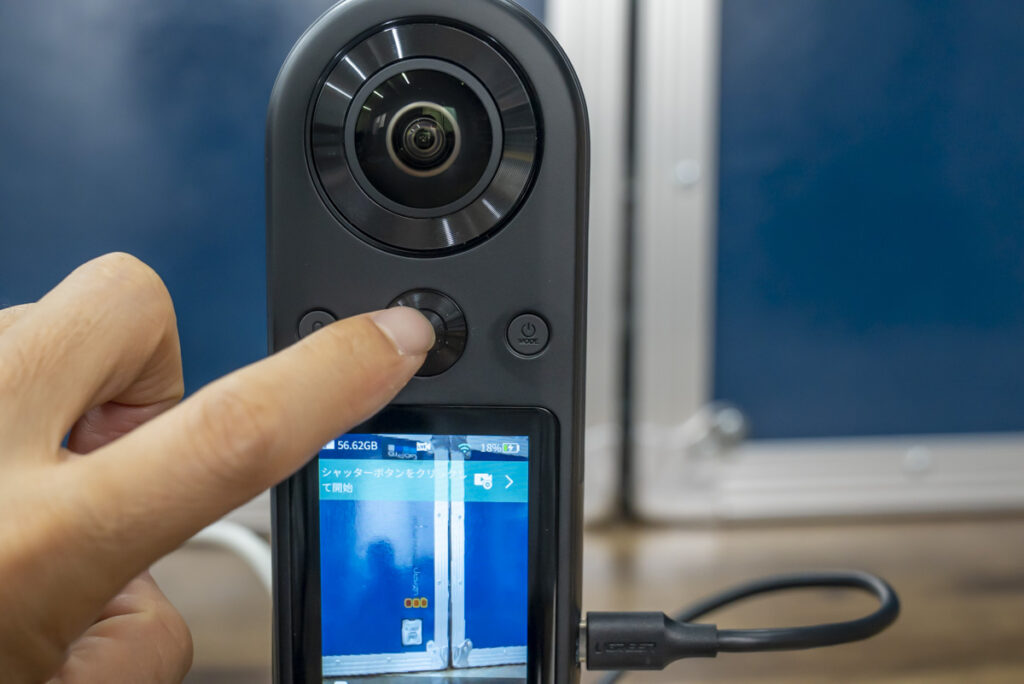
First, power on the camera and initialize it to avoid any unnecessary settings. To start, press and hold the button on the right side of the camera’s front.

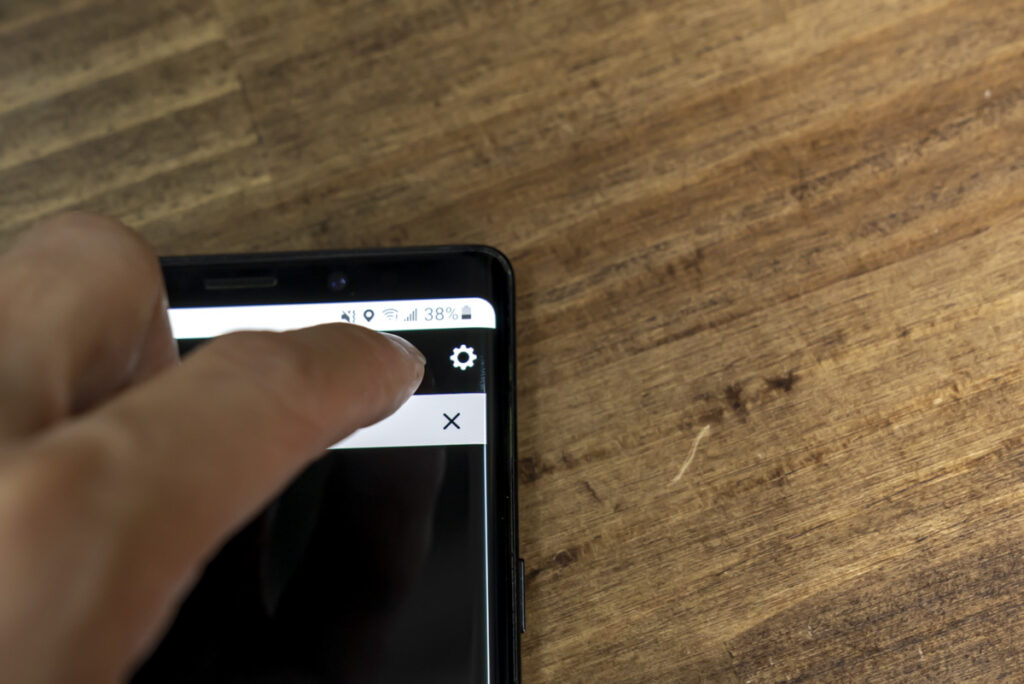
Swipe your finger from the top to the bottom of the touch screen to bring up the menu. Enter the settings by tapping on the gear icon.
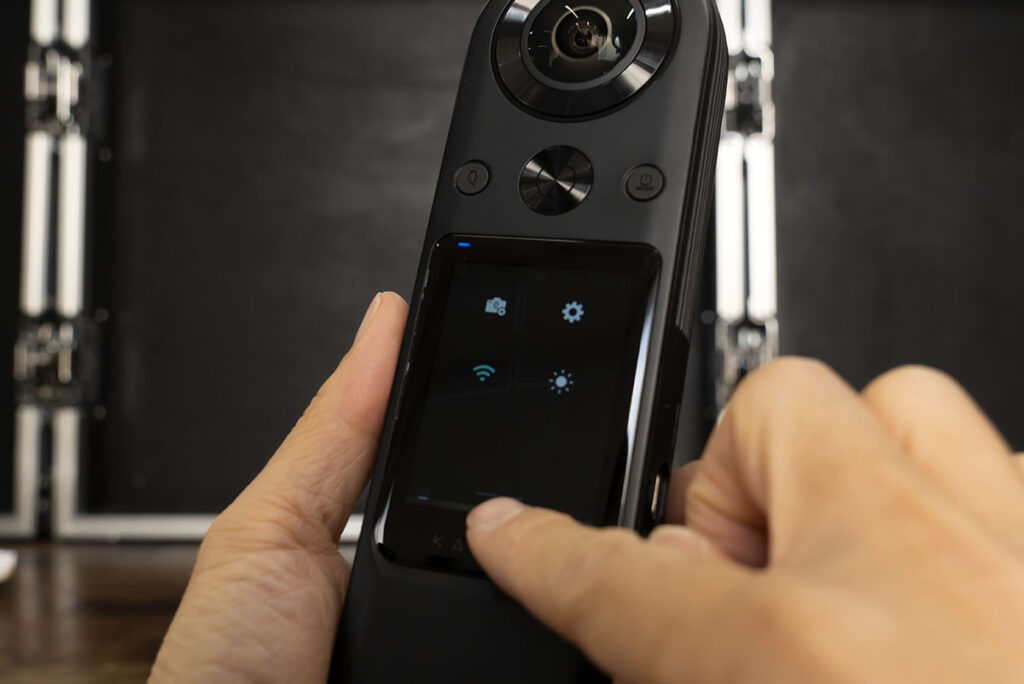
Enter the settings by tapping on the gear icon and select “Reset to Factory Settings.” The device will initialize and reboot. Follow the instructions for setting the “Language, Date/Time, and IMU Calibration.” ※When calibrating the IMU, make sure to use a tripod to prevent the camera from falling over. If the camera falls lens-first, it could get scratched or the lens might break.
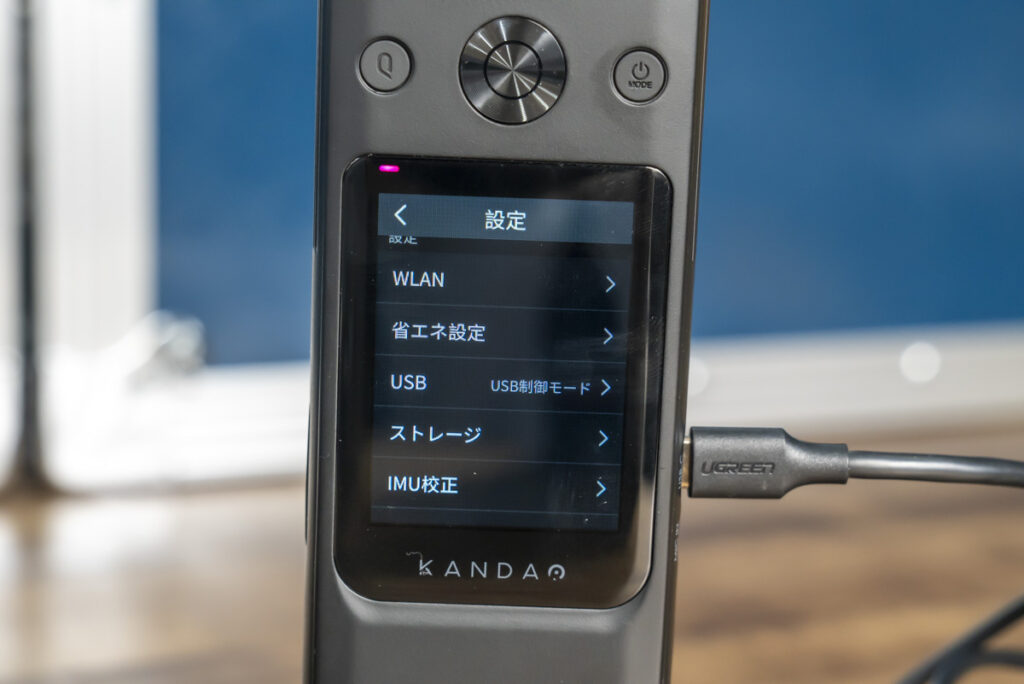
I’ll explain the key points to be mindful of when conducting long-duration 360° VR live broadcasts. Swipe from the top to the bottom of the touch screen to bring up the menu again, then enter the settings by tapping on the screw icon.
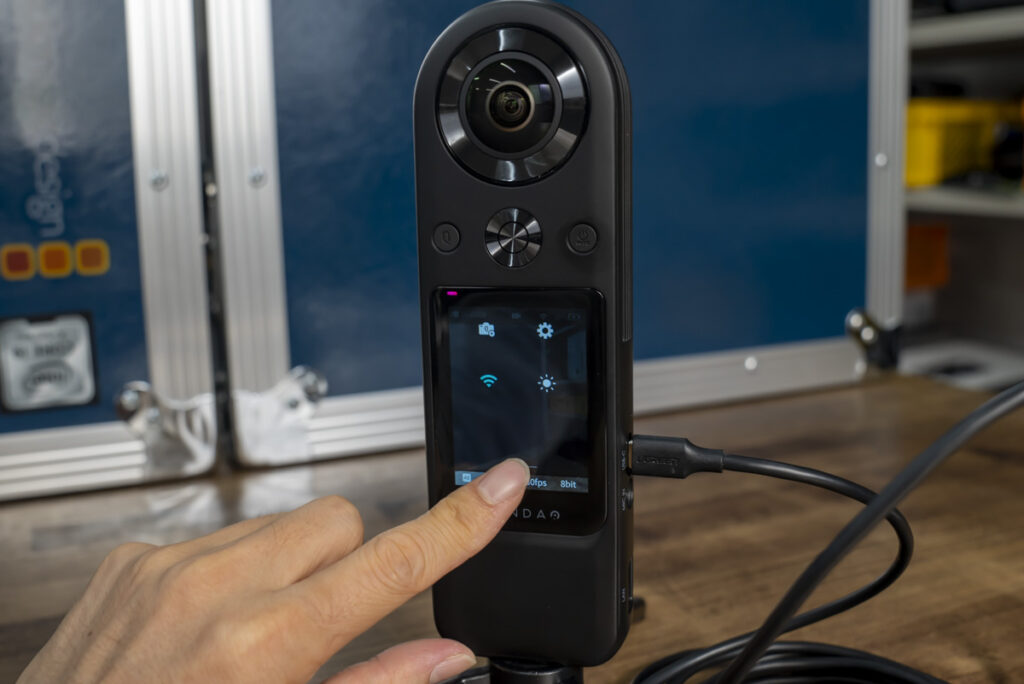
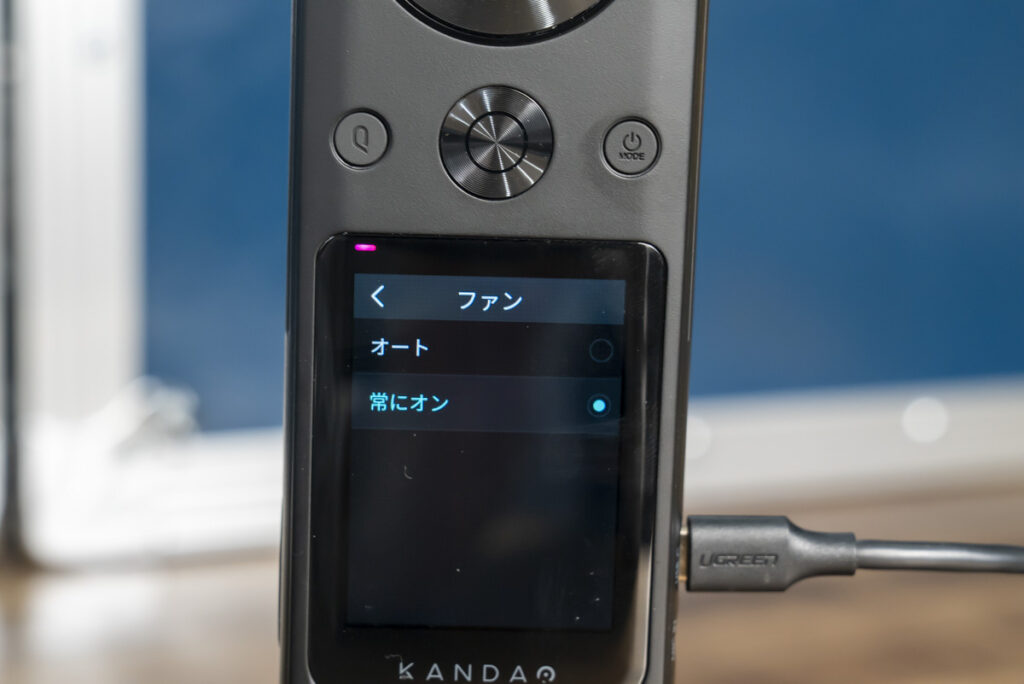
For VR live streaming, set the cooling fan to “Always On” because the device can get very hot. By default, the fan stops during recording. If you are broadcasting in a cool environment or for a short duration, setting it to “Auto” is fine.
Scroll down in the settings menu to enter the power-saving options.
ファンをオートから、「常にオン」に変更します。
Next, we’ll enable connection to a smartphone. You can control the QooCam 8K Enterprise from an Android device. Search for “QooCam 8K” in the app store and install the app that appears.
There are two ways to connect the app: wirelessly via WiFi and wired (using the short USB Type C cable included). If the wireless connection fails, you can use the included short USB Type C cable to connect. Therefore, Android devices with Type C compatibility are recommended.
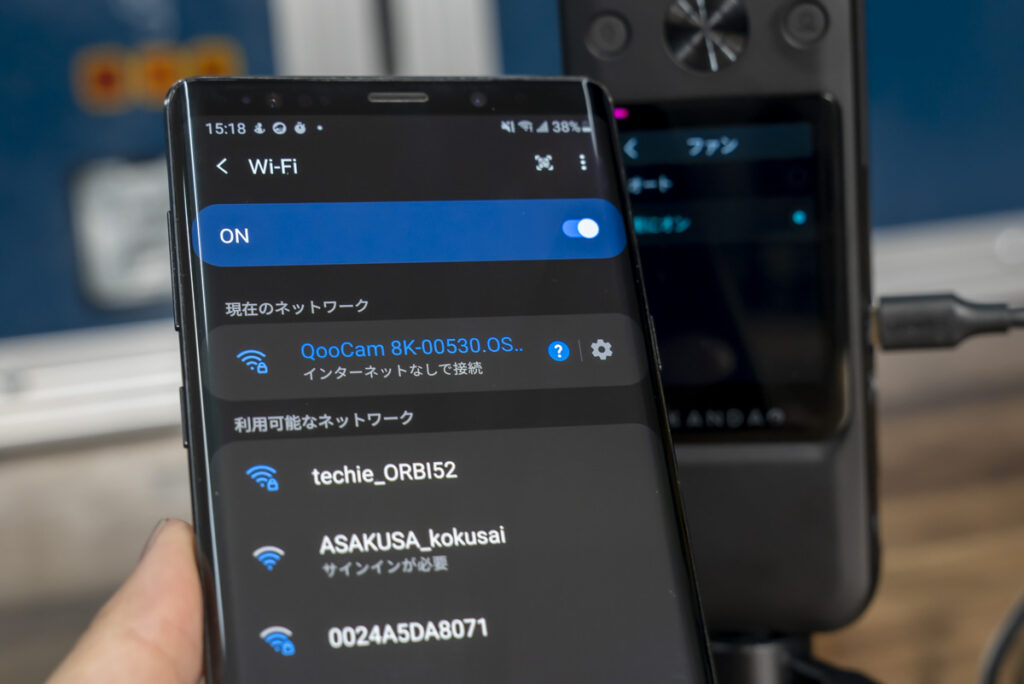
To connect via WiFi, connect your smartphone to the WiFi of the QooCam 8K Enterprise. Turn on the camera and you will find the WiFi network available. The password is 12345678. After connecting to the WiFi, launch the app.
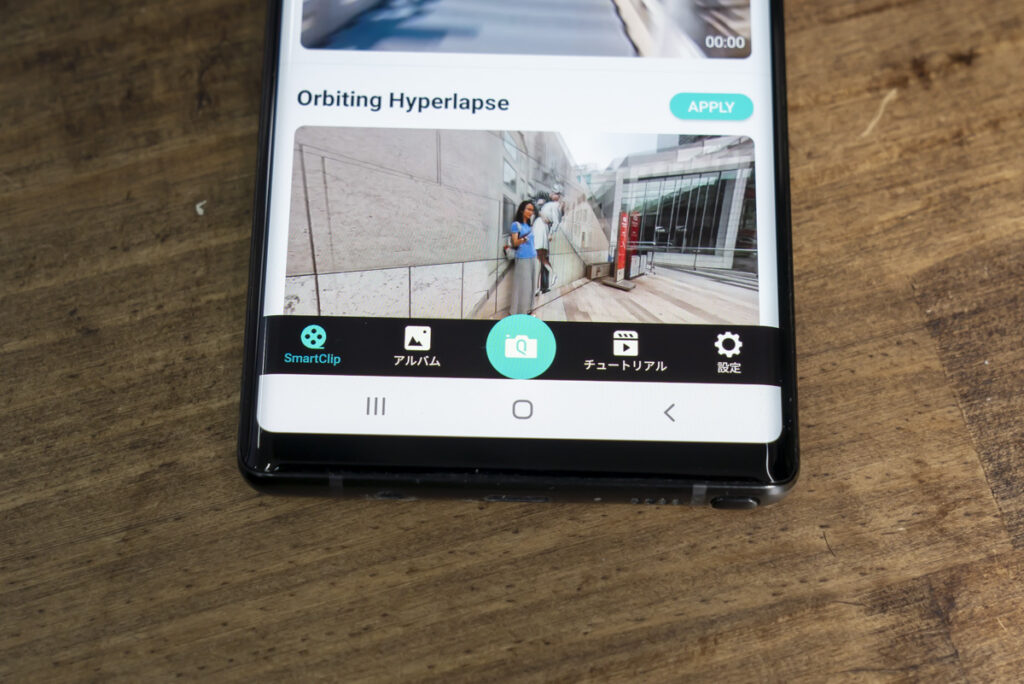
If you’re using the included short USB Type C cable, the app will automatically launch upon connection if it’s already installed. This method is useful when you want a reliable connection or if the wireless option isn’t working well. Once connected, a menu screen will appear. Tap the camera icon at the bottom center.
Once connected, tap the screw icon in the top right corner.
If there’s a firmware update available, go ahead and update it. Updates often include bug fixes.

Return to camera operations and select Live Pro from the menu below.

Next to the LIVE (REC button), tap the ‘f’.

Options like Facebook, YouTube, Kwai, and Others will appear. While there are features for linking accounts, these can be confusing, so it’s recommended to choose the “Others” option.
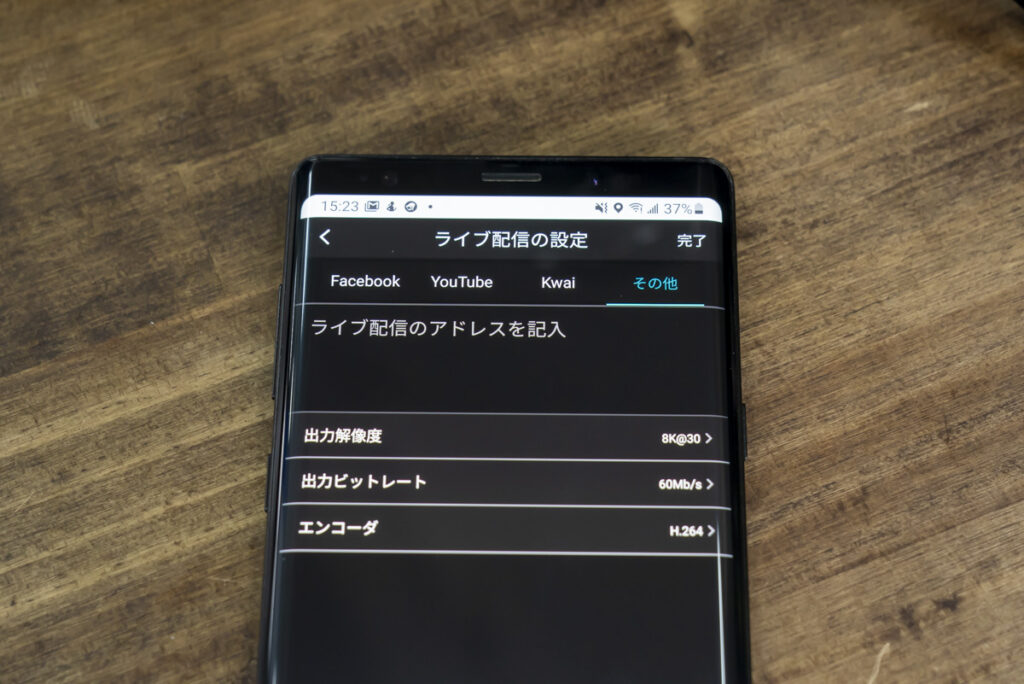
Here, you’ll enter the RTMP server URL for your broadcast. As long as you can see this input screen, you’re good to go. For now, we’ll step away from this screen.
Setting Up YouTube for 360° VR Live Streaming
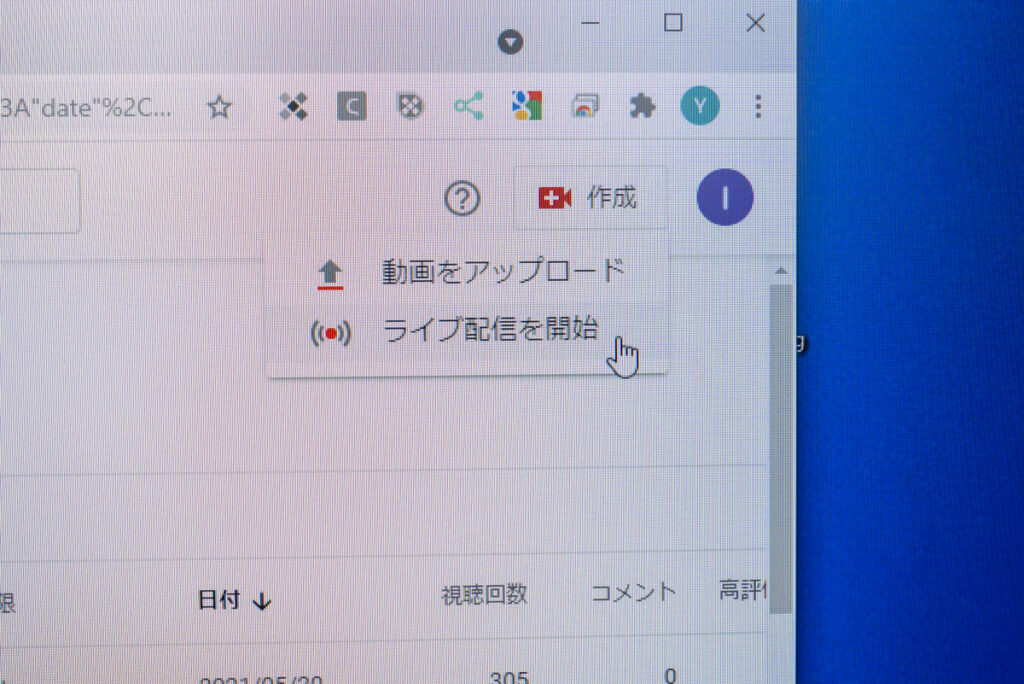
First, you’ll need to create a YouTube RTMP server URL. Access YouTube and click on the ‘camera icon with a plus’ at the top right corner, then click on “Go live.” It’s easier to perform these steps on a computer.
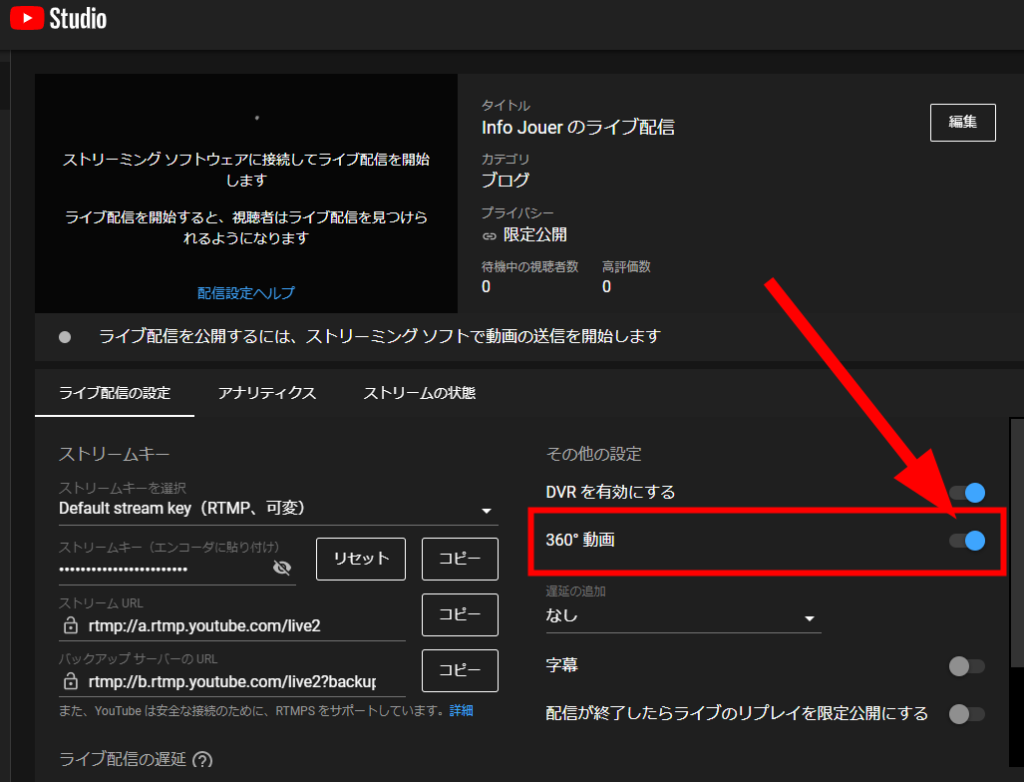
Enter the live broadcasting interface. ※Ensure you have previously registered for live streaming capabilities on YouTube. Always turn on the “360° video” setting first. Make sure not to forget this.
In the live broadcast settings, you can choose between normal delay, low delay, and ultra-low delay, which will affect both resolution and the delay time. I measured the delays during testing:
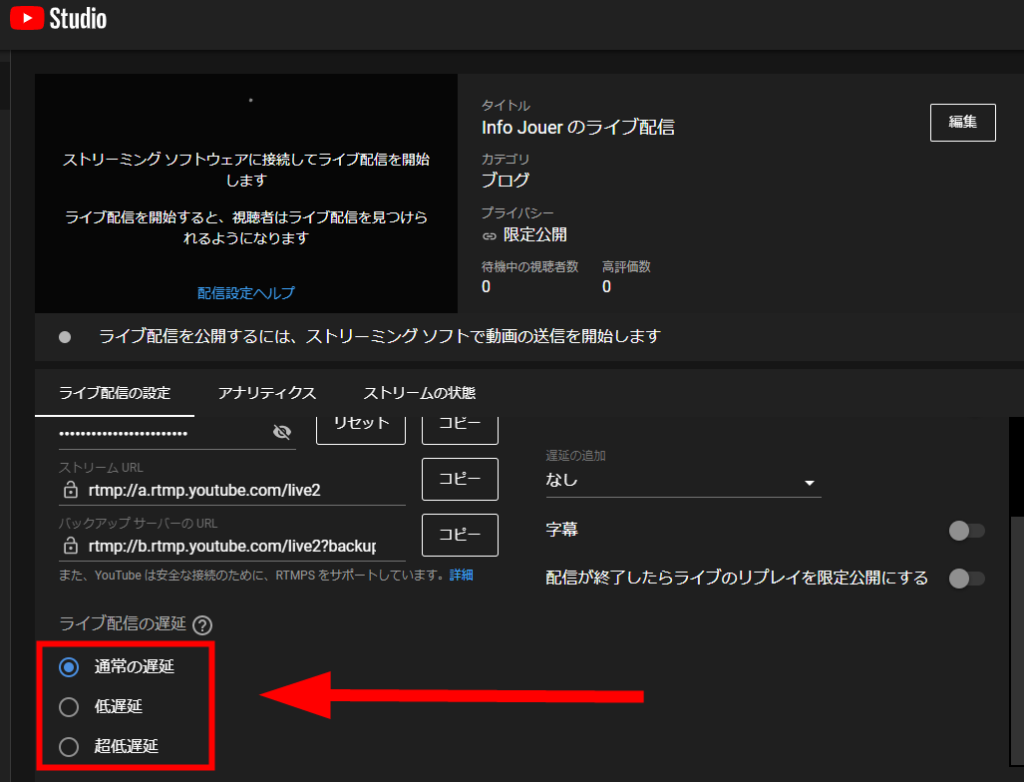
Normal delay: 3840×2160@30fps, about 30 seconds
Low delay: 2560×1440@30fps, about 15 seconds
※Ultra-low delay: 2560×1440@30fps, about 6 seconds
※Note that ultra-low delay is marked as ‘not supporting captions, 1440p, or 4K resolutions,’ yet 1440p was selectable during my tests. Also, Chrome was unstable in ultra-low delay mode, while Edge was stable—this may be a bug. Ultra-low delay might lead to instability. There isn’t much difference between the 15-second low delay and 30-second normal delay, so normal delay for 4K viewing is recommended.
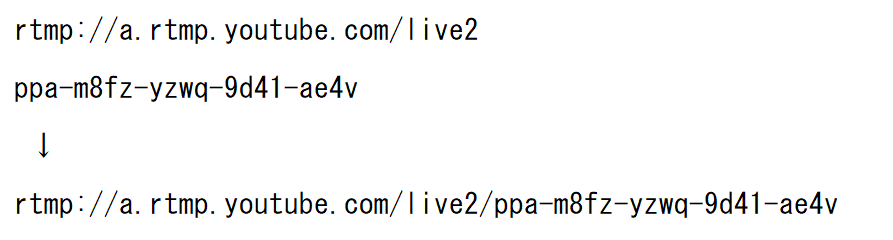
① Copy the Stream URL and ② Stream Key, then combine them in a text editor into a single line like this, using a slash.

Send this text to your smartphone. You could email it from your computer to your smartphone, or use a multi-platform online tool like Slack to make copying and pasting the RTMP broadcast URL easy on your smartphone.
Reconnect your smartphone and QooCam 8K. Proceed to the ‘Others’ in the live broadcast settings you accessed earlier. Choose 4K@30. Paste the RTMP broadcast URL you copied earlier. You can paste it by long-pressing on the screen of your smartphone—standard smartphone operation.
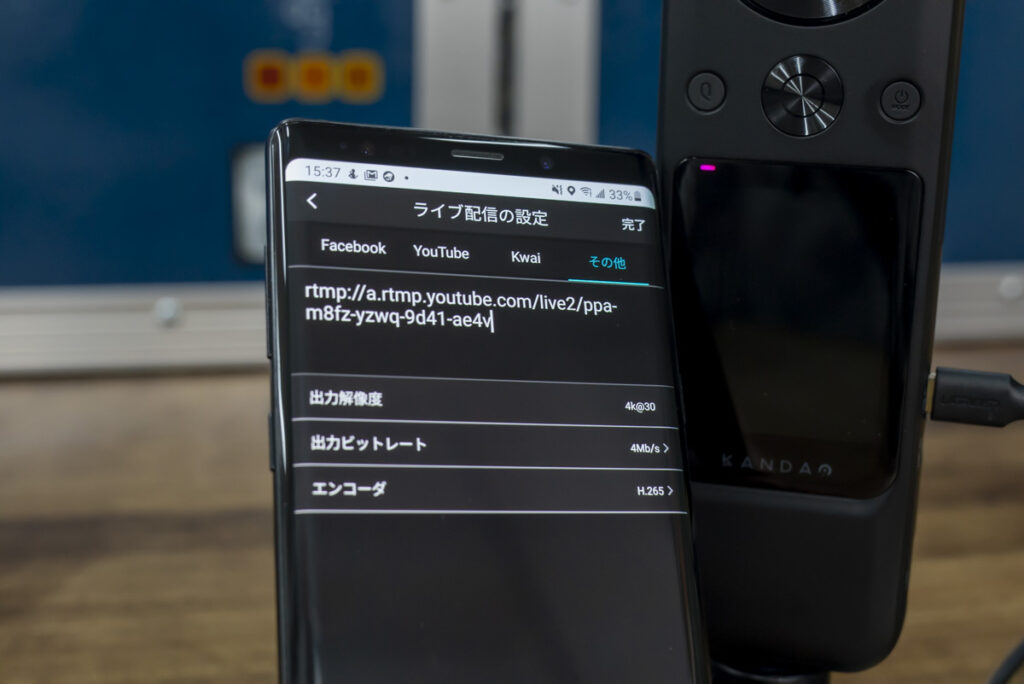
Initially, set the output bitrate at about 4Mb/s※. YouTube supports H265, which you can choose. Once settings are complete, press done. ※If your connection is very fast, you might set it higher.
Connect the QooCam 8K Enterprise to a wired LAN connector. (※It’s fine to have connected from the beginning—I forgot during the article creation.)
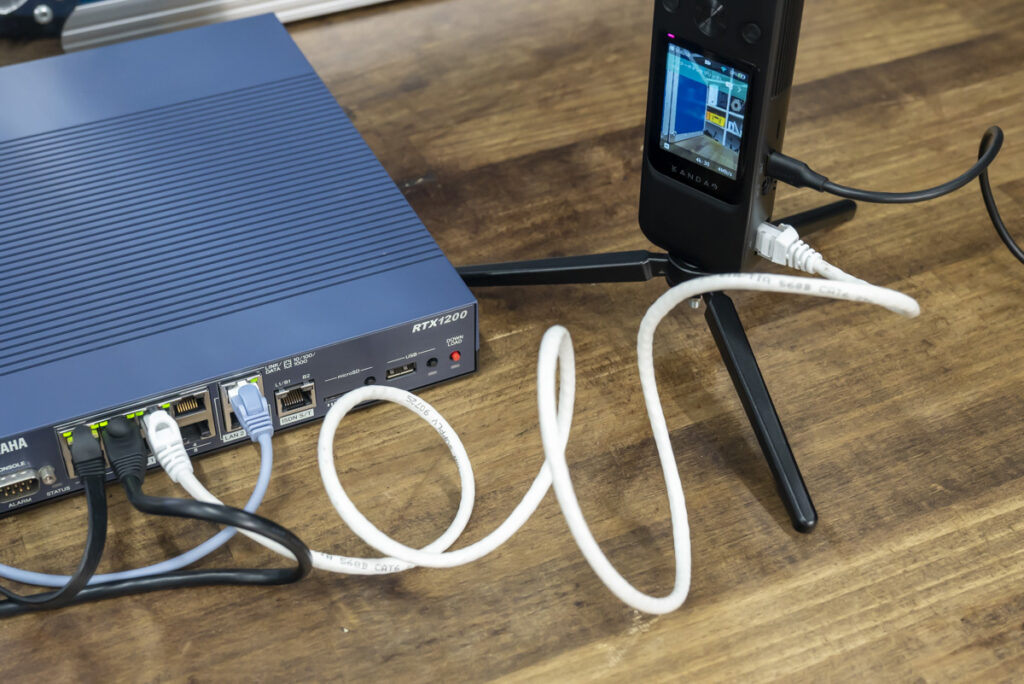
If the network connects properly, pressing the Live button on the app or the REC button (LIVE) on the camera body will start the broadcast.

Once the broadcast URL is set, you can simply press the REC button on the camera body to start broadcasting. The broadcast URL will be stored in the camera. You don’t need to keep it connected to the smartphone. ※Note that YouTube’s broadcast URLs change approximately every day. If your broadcast extends over several days, be mindful of URL changes.
Check the YouTube streaming management screen to ensure the stream is responding correctly.

Right-click on the actual broadcast screen to view the video information. The quality is indeed 4K and looks sharp. Whether on a monitor or smartphone, you can freely change the viewing angle in 360°. You can also try viewing it in VR using an HMD or cardboard viewer.

Settings like making the live broadcast private and viewing options will follow YouTube’s guidelines, so please search as necessary. If you just want to try it out, consider renting a complete set. We also sell complete systems, so feel free to contact us for inquiries.